BUYING a second hand CARAVAN – WHAT TO CHECK? What to look for when buying a used caravan?
Buying Your First Caravan: An Essential Inspection Checklist (Don’t Get Scammed!)
Buying your first caravan is thrilling—it’s the start of a great adventure! However, the used caravan market can be a risky business. In my experience, many older caravans do not match their description, and some ruthless sellers will exploit a first-time buyer’s lack of knowledge.

If you’re shopping on a budget (a few hundred to a couple of thousand pounds), you’re entering a minefield. But don’t worry—you can still find a great deal and avoid buying a lemon!
Here is my essential guide on what to check, how to inspect, and how to conduct yourself before you hand over your hard-earned money.
🚨 Rule Number One: Never, ever admit to the seller that this is your first caravan. You want them to think you know exactly what you’re looking for.
Phase 1: The Pre-Inspection Call (The Seller Test)
Before you even leave your home, you need to set expectations and test the seller’s honesty. A genuine seller should have nothing to hide and will be proud to show off their van.
What to Demand Before You Arrive:
- Time: Warn the seller that you will need at least an hour (possibly longer) for a thorough inspection.
- Power Sources: Insist the caravan must have all three power sources ready to test the appliances:
- Mains Electricity (EHU): Connected.
- Gas: A gas cylinder should be in the front locker.
- Battery: A charged leisure battery must be in place.
- Water: An Aquaroll (or similar container) with water, a water pump, and a filter must be present.

Red Flags (Don’t Waste Your Time):
If the seller comes up with excuses like, “We ran out of gas,” “The dog chewed the water pump,” or “We can’t connect the mains here,” don’t go. If they are genuine, they should have everything ready. If you’re feeling generous, you can offer to bring your own battery, gas, or generator—but if the excuses continue, pass.
Phase 2: The Exterior Inspection (Damp and Damage)
Once you arrive, start your inspection outside. You are looking for signs of two major issues: accidental damage and water ingress (damp).
1. Accidental Damage
- Towing Scars: Look for scratches or full-on dents, especially around the corners, which happen easily when reversing or towing.
- Windows & Lights: Check that all windows are solid, in one piece, and have no scratches, dents, or cracks. Look at the exterior lights—even a small crack can cost £50 or more to replace. Look for signs of older damage, like a window broken while driving (it happens!).
2. Water Ingress (The Caravan Killer)
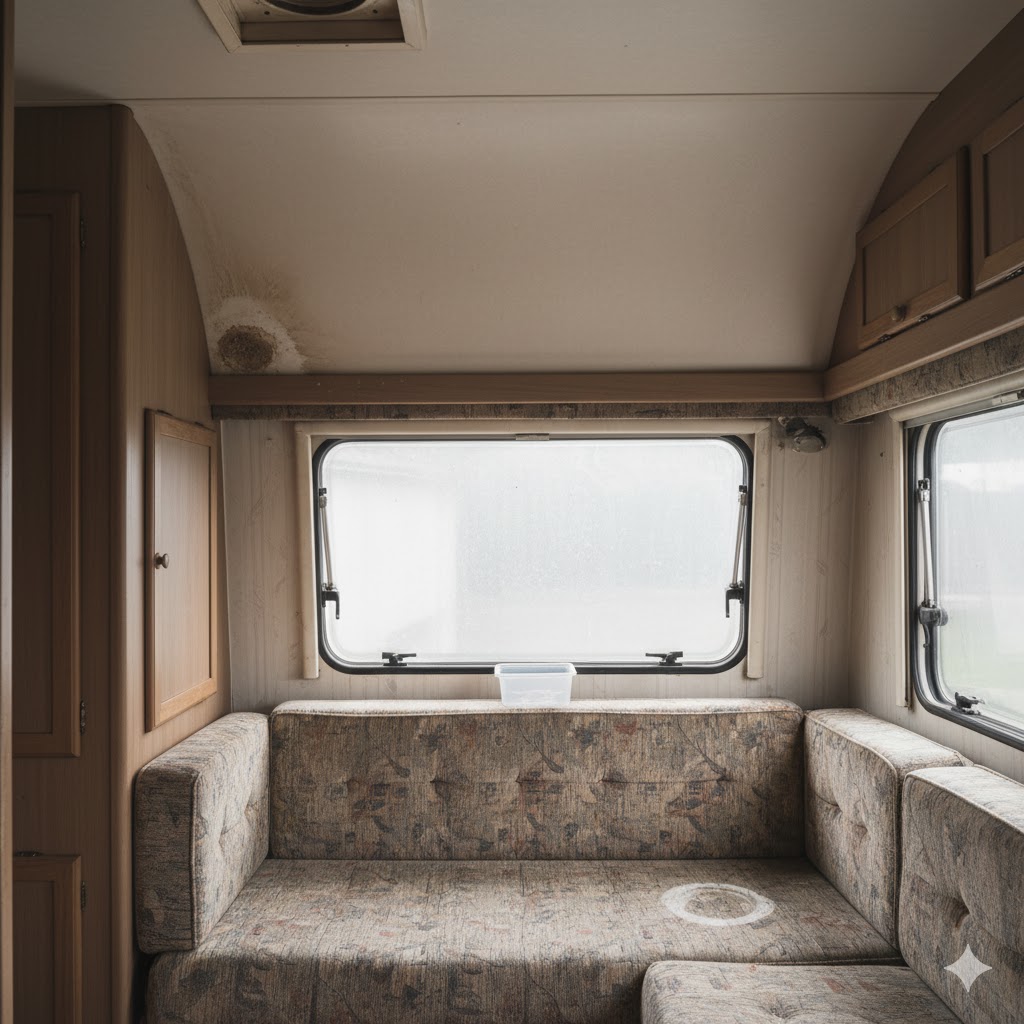
Water ingress is the biggest risk for older caravans. Water plus the plywood structure equals rot, which can kill the entire caravan structure.
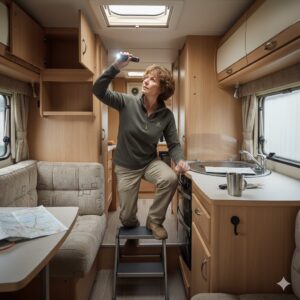
- The Roof (Take a Ladder!): Don’t be shy—take a ladder! Inspect the roof for holes or any areas where water is pooling (standing water). Viewing the caravan after heavy rain is a bonus, as standing water immediately indicates a problem.
- Underneath (Take a Mat!): Get down and check the chassis for excessive rust.
- Joints & Seals: Inspect all joints and seals. They must be watertight, solid, and completely filled in. If you see signs of new sealant or repair, ask the seller what happened and who performed the repair.
We strongly recommend bringing a damp meter with you. This small, cheap gadget measures the damp levels in surfaces without the need to make holes! We recommend checking the caravan from top to bottom, ceiling, walls and the floor. It may be the best spent £19 in your life!
For a reference here are the acceptable and non acceptable results:
| Moisture Reading (%) | Condition | Meaning / Action |
|---|---|---|
| 0–15% | Normal / Dry | Excellent. No damp issues. Typical for a healthy caravan. |
| 15–20% | Slightly Elevated | Monitor carefully. Could be early signs of damp or condensation — recheck in a few months. |
| 20–25% | Warning Zone | Possible water ingress. Investigate further — check seals, joints, and around windows/vents. Drying and resealing may be needed. |
| 25–30% | High / Damp Present | Likely active damp. Timber may be starting to soften. Professional inspection and repair required. |
| 30%+ | Severe Damp | Serious water ingress and structural damage possible. Needs urgent attention and likely costly repair.
|
Phase 3: The Interior Inspection (Feel, Smell, and Test)
This is where you find out if you’re buying a solid structure or a spongy wreck.
1. The Smell Test (Crucial!)
As you walk in, take a deep breath. You are checking for two smells:
- Damp/Mould: You will usually smell damp immediately if the caravan is leaking.
- Fresh Paint: Be very suspicious of the smell of fresh paint, as it’s often used to cover up mould or water damage just before a viewing.
2. The Sponge Test
Visually inspect, and then have a little feel of the walls and floor.
- Walls: Literally push on the walls, section by section. They should feel solid. If you feel any bending, separation of layers, or a spongy feel, it is a strong indicator of water ingress and rotten plywood.
- Floor: Walk around and make sure the floor is solid. It should not bend or feel soft under your feet.
3. The Appliance Check (Test Everything!)
This is why you insisted on having all three power sources available. Most caravan appliances are “three-way,” meaning they run on 230V mains, 12V battery, or Gas.
- The Fridge: Test the fridge on all three settings (230V, 12V, and Gas). A new three-way fridge is easily over £300 to replace.
- The Heater: Ask the seller to switch on the gas heater and demonstrate that it works. A working second-hand unit is over £100.
- Water System: Turn on the water pump (requires battery or mains) and test every single tap, in the kitchen and the bathroom. Do not take their word for it! Make sure water is actually running and connected. Test the toilet flush, too.
- Water Heater: Ideally, the water heater (running on gas or electricity) should be switched on before you arrive so you can verify that warm water runs from the taps.
- Skylights: Check that the skylights are not cracked and that the handles are not broken (new skylights cost around £50–£100+).
4. The Furniture & Finishing Touches
- Blinds and Nets: Test every single blind and mosquito net. They break very easily, especially in newer vans.
- Window Arms: Check that all the small plastic arms that hold the windows open are present and not snapped.
- Cushions: Check the cushions for wear, tears, or dog damage. A second-hand set can cost over £130.
- The Bed: Finally, make the bed and lie down! This sounds silly, but you must ensure you and your family can actually fit. A bed that’s too short is a nightmare.
Final Advice: Be Brave, Be Wary
The general advice is: Check everything, do not be rushed, and do not feel like a dummy. If the seller is rushing you or giving you vague answers like, “My husband deals with that,” or “I’ve never used the gas heater,” be wary. Unfortunately, not all sellers are genuine.
If you can, bring a friend who already owns a caravan and has experience. Nothing beats that extra pair of knowledgeable eyes.
Buying an older caravan can be risky, but if you’re careful, you can avoid junk and find yourself a lovely, dry, solid van that’s built to last. Be smart, be savvy, and good luck!